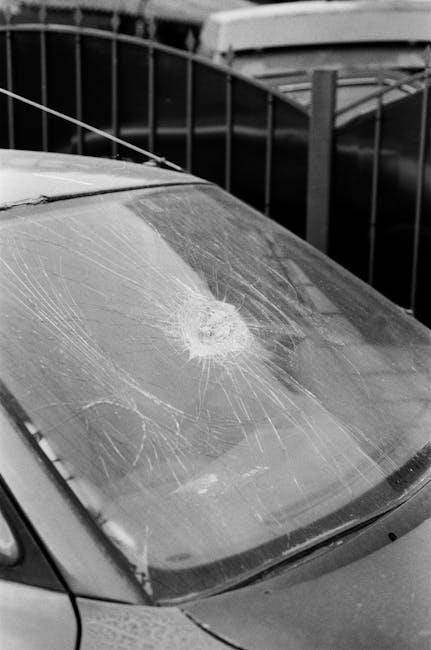
The Permatex Windshield Repair Kit is a professional-grade solution designed to fix bullseye chips and small cracks in laminated windshield glass effectively. It provides a permanent, air-tight repair that prevents damage from spreading, ensuring safety and clarity. The kit is user-friendly, with easy-to-follow instructions and all necessary components included for a seamless DIY experience.
1.1 Overview of the Product
The Permatex Windshield Repair Kit is a complete, professional-grade solution for repairing bullseye chips and small cracks in laminated windshield glass. Designed for DIY users, it includes a resin applicator, syringe, and detailed instructions for a straightforward process; The kit ensures air-tight, permanent repairs that prevent damage from spreading, restoring clarity and safety to the windshield. It works on most laminated glass types and is safe, easy to use, requiring no mixing or heat. The repair is virtually undetectable, making it an ideal choice for drivers seeking a reliable, cost-effective fix.
1.2 Importance of Proper Windshield Repair
Proper windshield repair is crucial for maintaining vehicle safety and structural integrity. Untreated chips or cracks can spread, leading to costly replacements and potential hazards while driving. The Permatex Windshield Repair Kit offers a reliable solution to prevent further damage, ensuring a clear view and adherence to safety standards. Addressing windshield issues promptly also helps avoid legal penalties and maintains the overall value of the vehicle. Timely repair with the right tools ensures a safe and efficient fix, keeping drivers and passengers protected on the road. Regular maintenance and immediate attention to damage are essential for optimal results.

Safety Precautions
Always wear protective gloves and goggles when using the Permatex Windshield Repair Kit. Ensure the area is well-ventilated to avoid inhaling fumes. Follow instructions carefully.
2.1 General Safety Guidelines
When using the Permatex Windshield Repair Kit, ensure the workspace is clean and dry to prevent contamination. Always wear protective gloves and goggles to avoid skin and eye irritation. Perform the repair in a shaded area, as direct sunlight can interfere with the curing process. Maintain windshield temperatures between 50°F and 75°F for optimal results. Avoid allowing the resin to come into contact with skin or other surfaces. Follow the instructions carefully to ensure safety and effectiveness. Keep the kit out of reach of children and work in a well-ventilated area to avoid inhaling fumes. Proper preparation and adherence to guidelines are crucial for a successful repair.
2.2 Handling the Repair Kit Components
Handle all components of the Permatex Windshield Repair Kit with care to ensure optimal performance. The syringe containing the resin should be stored upright to prevent leakage. Avoid touching the tip of the syringe to prevent contamination. Use the included applicator as instructed to spread the resin evenly. Keep the kit away from direct sunlight and heat sources. Always clean the applicator and syringe immediately after use with a residue-free solvent to maintain their effectiveness. Proper handling ensures the longevity and functionality of the components, leading to a successful repair. Follow the manufacturer’s guidelines for storage and disposal.
Materials Needed
The Permatex Windshield Repair Kit includes a syringe with resin, an applicator, and instructions. Additional tools like a scraper or microfiber cloth may be required for preparation.
3.1 Components Included in the Kit
The Permatex Windshield Repair Kit includes a specially formulated resin syringe, an applicator with a built-in tool for removing air bubbles, and a detailed instruction manual. Additionally, the kit contains a curing film to ensure proper hardening of the resin. The components are designed to work together seamlessly, providing everything needed for a successful repair. The syringe delivers the precise amount of resin required, while the applicator ensures even distribution. The kit is compact and portable, making it easy to use in various settings. Instructions are clear and include photographs for visual guidance.
3.2 Additional Tools and Materials Required
While the Permatex Windshield Repair Kit includes most necessary components, a few additional tools and materials are recommended for optimal results. A clean, dry microfiber cloth is essential for preparing the damaged area. Isopropyl alcohol or a residue-free solvent is needed to clean the windshield surface thoroughly. A razor blade or similar tool may be useful for removing old repair attempts or debris. A heat source, such as a hairdryer, can assist in curing the resin if environmental conditions are not ideal. Basic protective gear, like gloves and safety glasses, is also advisable. These items ensure a smooth and effective repair process.
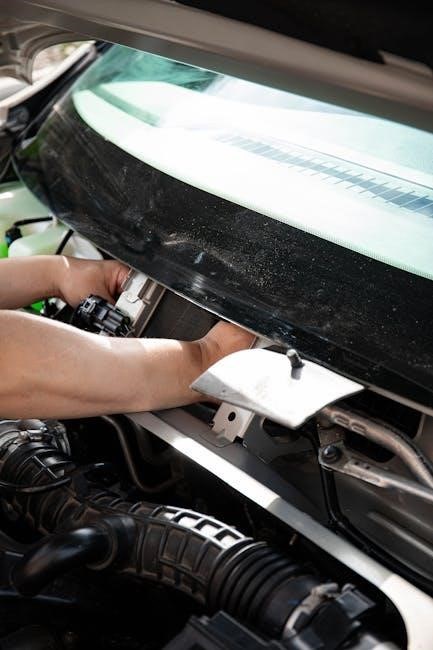
Preparing the Windshield Surface
Thoroughly clean the damaged area using a residue-free solvent like isopropyl alcohol and a microfiber cloth. Scrape off any existing repairs and ensure the surface is dry.
4.1 Cleaning the Damaged Area
Thoroughly clean the damaged area using a residue-free solvent, such as isopropyl alcohol, and a microfiber cloth to remove dirt, oil, or debris. Scrape off any existing repairs or residue using the included scraper, taking care not to damage the glass further. Ensure the surface is completely dry and free of contaminants before proceeding. Proper cleaning ensures the resin adheres correctly, minimizing the risk of air bubbles or incomplete sealing. Allow the area to air dry or gently wipe with a clean cloth to eliminate moisture. A clean surface is essential for a successful repair.
4;2 Ensuring Proper Temperature Conditions
Temperature plays a crucial role in the success of the windshield repair. Perform the repair in a shaded area where the windshield temperature is between 50°F and 75°F (10°C and 24°C). Avoid direct sunlight, as it can cause the resin to cure too quickly, potentially leading to air bubbles. If necessary, use a shade or perform the repair during cooler parts of the day. Ensuring the windshield is at room temperature promotes even resin spreading and proper adhesion. Avoid repairing in extreme cold or heat, as this can slow down or accelerate the curing process, affecting the repair’s effectiveness.
Applying the Resin
Using the syringe, carefully remove air bubbles and inject the resin into the damaged area. Ensure even distribution for a smooth, bubble-free repair. Avoid overfilling.
5.1 Removing Air Bubbles
To remove air bubbles, inject the resin slowly into the damaged area using the syringe. Gently manipulate the syringe to distribute the resin evenly. If bubbles appear, lightly tap the windshield or use the syringe to apply pressure, forcing bubbles to the surface. This ensures a smooth, bubble-free repair. Patience is key, as rushing may displace bubbles without removing them. Perform the repair in a shaded area to maintain optimal resin consistency and ease of manipulation.
5.2 Filling the Damaged Area
Once air bubbles are removed, carefully fill the damaged area with the provided resin using the syringe. Ensure the applicator is held at a slight angle to spread the resin evenly across the chip or crack. Gently press the resin into the damaged area using the applicator tool, making sure it flows naturally into the glass layers. Avoid overfilling, as this can lead to a messy finish. Allow the resin to settle before proceeding to the next step. The goal is to create a smooth, even surface that blends seamlessly with the undamaged glass.
Curing the Resin
The resin cures best in shaded areas with temperatures between 50°F and 75°F. Avoid direct sunlight or moisture. Allow the resin to cure for 15–30 minutes for a proper seal.
6.1 Recommended Curing Time
The Permatex Windshield Repair Kit requires a curing time of 15 to 30 minutes for optimal results. Ensure the windshield is in a shaded area with temperatures between 50°F and 75°F. Avoid direct sunlight or moisture during this period, as it may interfere with the curing process. The resin will fully harden and form a strong, permanent bond within the recommended time frame. For best results, allow the repair to cure undisturbed. Environmental factors, such as humidity or extreme temperatures, may slightly extend or shorten the curing time. Always follow the kit’s instructions for precise curing guidelines.
6.2 Environmental Factors Affecting Curing
Environmental conditions significantly impact the curing process of the Permatex Windshield Repair Kit. High humidity can slow down the curing time, while direct sunlight may cause the resin to cure too quickly, potentially leading to imperfections. Extreme temperatures, either too hot or too cold, can affect the resin’s ability to form a proper bond. It is crucial to perform the repair in a shaded area with temperatures between 50°F and 75°F for optimal results. Avoid exposing the repair to moisture or contaminants during the curing process, as this may compromise the integrity of the seal. Always adhere to the kit’s guidelines to ensure a successful repair.
Inspecting and Finishing the Repair
After curing, inspect the repair for clarity and proper sealing. Scrape off any excess resin and clean the area thoroughly. Ensure no contaminants remain.
7.1 Checking for a Proper Seal
After the repair, inspect the area for a proper seal by ensuring no air bubbles or gaps remain. Visually examine the damaged zone to confirm the resin has fully filled the chip or crack. Gently scrape away any excess resin with a razor blade to create a smooth surface. Avoid using harsh chemicals or excessive force to prevent damaging the glass. A proper seal ensures the repair is durable and prevents further damage from spreading. If the seal appears incomplete, repeat the resin application process as needed. Ensure the windshield is clean and dry before final inspection. Proper sealing is crucial for long-lasting results.
7.2 Final Touch-ups and Clean-up
Once the resin is cured, use a razor blade to gently scrape away any excess material, ensuring a smooth finish. Avoid applying too much pressure, which could damage the glass. Wipe the area with a clean, lint-free cloth to remove any residue. Inspect the repair under daylight to ensure clarity and proper bonding. If necessary, additional touch-ups can be made by repeating the resin application process. Clean all tools with a solvent, such as isopropyl alcohol, and store them properly. Avoid using harsh chemicals or abrasive materials, as they may compromise the repair. Proper clean-up ensures a professional-looking result.
Common Mistakes to Avoid
Using incorrect resin application techniques and ignoring temperature guidelines are common errors. Avoid overfilling the damage and not allowing proper curing time, as this can lead to imperfect repairs.
8.1 Incorrect Application of Resin
Incorrectly applying the resin can lead to incomplete sealing and reduced effectiveness. Overfilling or applying too little resin disrupts the repair process. Ensure the applicator is held at the correct angle to prevent air bubbles. Using the syringe improperly may push resin out unevenly. Always follow the step-by-step instructions for proper application and pressure. Avoid touching the damaged area with the tip of the syringe to prevent contamination. Proper alignment and steady pressure are crucial for a smooth, even fill. This ensures a strong, lasting bond and a nearly invisible repair.
8.2 Improper Curing Conditions
Improper curing conditions can significantly affect the repair’s effectiveness. The resin requires a specific temperature range (50°F to 75°F) to cure properly. Exposure to direct sunlight or high heat can cause the resin to cure too quickly, leading to a weakened bond. Conversely, temperatures below 50°F may slow or prevent curing entirely. Ensure the windshield is in a shaded area during the curing process. Humidity and contamination can also disrupt the curing process, resulting in a less durable repair. Always adhere to the recommended curing time specified in the instructions for optimal results.

Troubleshooting
If issues arise during the repair, check for proper resin application, ensure no contamination occurred, and verify that temperature conditions were within the recommended range.
If the resin fails to cure, ensure the windshield temperature is between 50°F and 75°F. Avoid direct sunlight, as it can hinder the curing process. Check for any contamination or improper mixing of the resin. If issues persist, inspect the syringe for blockages or air bubbles. Allow the recommended curing time, typically 45 minutes to an hour, depending on environmental conditions. If the resin remains uncured, consult the kit’s instructions or contact Permatex customer support for further assistance. Proper conditions and application are crucial for a successful repair. If bubbles or imperfections appear during the repair, gently tap the applicator to eliminate air pockets. Ensure the resin is applied evenly and avoid over-filling the damaged area. If bubbles persist, use the syringe to carefully remove excess resin. Minor imperfections can be smoothed out with a razor blade after the resin cures. Proper preparation and slow, steady application are key to achieving a smooth, professional finish. Always follow the kit’s instructions for best results and consult troubleshooting guides if issues remain unresolved. The Permatex Windshield Repair Kit effectively repairs bullseye chips and small cracks, providing a permanent, air-tight seal that restores clarity and prevents further damage when applied correctly. The Permatex Windshield Repair Kit offers a cost-effective DIY solution for minor damages like bullseyes and small cracks. While professional repairs ensure expert results, the DIY kit provides a budget-friendly alternative with similar effectiveness for small damages. It comes with easy-to-follow instructions and necessary tools, making it accessible for car owners with basic skills. However, for larger or complex cracks, professional intervention is recommended to ensure safety and reliability. The kit’s success rate depends on proper application and adherence to instructions, making it a viable option for those comfortable with DIY automotive repairs. The Permatex Windshield Repair Kit delivers long-lasting results when used correctly on eligible damages. Repairs made with this kit are designed to be permanent and resistant to further cracking, ensuring durability over time. Proper application and adherence to instructions are critical for achieving a repair that lasts as long as the windshield itself. Environmental factors, such as extreme temperatures or contaminants, can affect the resin’s curing process, so following the recommended conditions is essential. With care, the repair remains stable and visually clear, providing a reliable solution for minor windshield damage. Regular inspections can help maintain its integrity and performance. The Permatex Windshield Repair Kit is effective for small bullseye chips and minor cracks but may not repair larger damages or certain types of breaks. The Permatex Windshield Repair Kit is designed for small bullseye chips and minor cracks but cannot address large spider webs, long cracks, or damage near the edge. It is also ineffective for deep or multiple layers of laminated glass. Additionally, it does not repair chips larger than 1.25 inches in diameter. For such extensive damage, professional replacement is typically required to ensure safety and maintain windshield integrity. The Permatex Windshield Repair Kit is effective for bullseye chips up to 1.25 inches in diameter and small cracks that do not exceed this size. It is not suitable for larger spider webs or long cracks that spread across the windshield. Damage exceeding these limits may not be fully sealed, potentially leading to further spreading. For chips larger than 1.25 inches or cracks near the edge, professional replacement is often necessary to ensure safety and maintain structural integrity. The kit’s effectiveness is limited to minor, contained damage. For further assistance, Permatex offers instructional videos and detailed guides on their website. Manufacturer support and customer service are also available for troubleshooting or additional questions. Permatex provides step-by-step instructional videos to guide users through the windshield repair process. These videos are available on their official website and YouTube channel, offering clear demonstrations of each step. They cover preparation, resin application, and curing, ensuring a smooth repair experience. The videos are designed to complement the written instructions, making it easier for DIY users to achieve professional-quality results. By following these visual guides, users can address common challenges and ensure a successful repair. The videos are concise, informative, and accessible to all skill levels, enhancing the overall effectiveness of the repair kit. Permatex offers comprehensive support for the Windshield Repair Kit through their dedicated customer service team. Users can access technical assistance via phone, email, or live chat on the official Permatex website. Additionally, the manufacturer provides detailed FAQs and troubleshooting guides to address common issues. For further inquiries, customers can visit the support section of their website, ensuring timely resolution of any concerns. This robust support system enhances user confidence and ensures a positive experience when using the repair kit. Permatex’s commitment to customer satisfaction is evident in their accessible and responsive service. Regular inspections, avoiding debris, and using protective films help prevent future windshield damage, ensuring long-lasting repairs and maintaining clear visibility while driving safely. To prevent future windshield damage, regularly inspect for minor chips or cracks and address them promptly. Avoid driving too close to vehicles that may kick up debris. Use a high-quality windshield treatment or protective film to shield against impact. Park in shaded areas to reduce thermal stress, which can weaken glass. Additionally, ensure proper wiper blade maintenance to avoid scratches. By adopting these habits, you can extend the life of your windshield and reduce the need for frequent repairs. Regular maintenance is key to preserving your windshield’s integrity. Regular maintenance checks are essential to identify and address potential windshield issues early. Inspect your windshield frequently for chips, cracks, or areas of wear. Clean the glass thoroughly to ensure clarity and remove contaminants that might cause damage. Check wiper blades for wear and replace them if necessary to prevent scratches. Perform repairs in shaded areas with temperatures between 50°F and 75°F for optimal results. Address minor damage promptly to prevent it from spreading. By incorporating these checks into your routine, you can help maintain your windshield’s integrity and ensure safe, unobstructed vision while driving. Regular upkeep is key to avoiding costly repairs. The Permatex Windshield Repair Kit simplifies the repair of bullseye chips and small cracks in laminated glass. The process begins with preparing the damaged area by cleaning and ensuring proper temperature conditions. Next, the resin is applied and air bubbles are removed to fill the damaged area completely. The resin is then allowed to cure, with recommended curing times depending on environmental factors. Finally, the repair is inspected for a proper seal, and any final touch-ups are made. This straightforward process ensures a permanent, air-tight repair that restores clarity and safety to the windshield. The Permatex Windshield Repair Kit is a convenient and effective solution for addressing bullseye chips and small cracks in windshield glass. Its ease of use, combined with comprehensive instructions, makes it an ideal choice for DIY enthusiasts and car owners seeking to avoid costly professional repairs. The kit’s ability to create a permanent, air-tight seal ensures long-lasting results, restoring both safety and clarity to the windshield. By following the steps carefully, users can achieve professional-quality repairs with minimal effort, making it a highly recommended tool for maintaining vehicle integrity.9.1 Resin Not Curing Properly
9.2 Bubbles or Imperfections in the Repair
Effectiveness of the Repair
10.1 Comparing DIY vs. Professional Repairs
10.2 Longevity of the Repair
Limitations of the Kit
11.1 Types of Damage That Cannot Be Repaired
11.2 Size Constraints for Repairable Damage
Additional Resources
12.1 Instructional Videos
12.2 Manufacturer Support and Customer Service

Preventative Measures
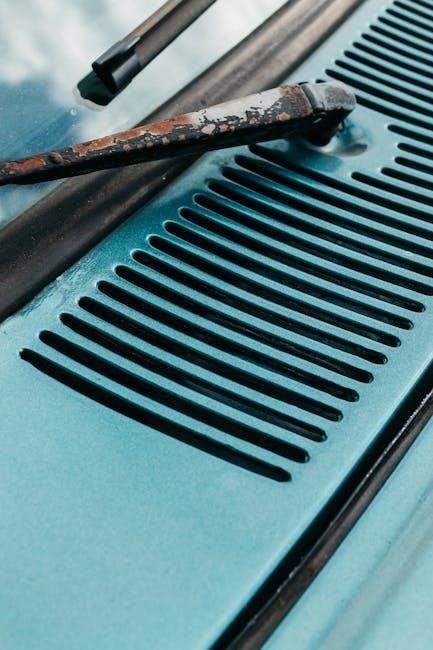
13.1 Avoiding Future Windshield Damage
13.2 Regular Maintenance Checks
The Permatex Windshield Repair Kit offers a reliable, DIY-friendly solution for fixing bullseye chips and small cracks, ensuring safe and clear vision while driving.14.1 Summary of the Repair Process
14.2 Final Thoughts on Using the Permatex Kit