
The Craftsman 24 Inch Snow Thrower Manual provides essential guidance for safe and effective operation, covering assembly, maintenance, troubleshooting, and warranty details to ensure optimal performance․
Overview of the Manual’s Purpose and Content
The Craftsman 24 Inch Snow Thrower Manual is designed to provide comprehensive guidance for users, ensuring safe and efficient operation․ It covers essential topics such as safety precautions, assembly instructions, and maintenance routines․ The manual also includes detailed diagrams and parts lists, helping users identify components and understand their functions․ Additionally, it outlines troubleshooting steps for common issues and provides warranty information․ The content is organized into clear sections, making it easy to navigate․ Whether you’re assembling the snow thrower, performing routine maintenance, or resolving operational problems, the manual serves as a vital resource․ It emphasizes safety and proper usage, ensuring users can maximize the product’s performance and longevity․
Importance of Reading the Manual Before Use
Reading the Craftsman 24 Inch Snow Thrower Manual is crucial for ensuring safe and effective operation․ It provides detailed instructions for assembly, safety precautions, and proper usage, helping users avoid potential hazards․ The manual highlights essential safety symbols and warnings, which are vital for understanding risks associated with the equipment․ By following the guidelines, users can prevent accidents and ensure the snow thrower functions optimally․ Additionally, the manual outlines maintenance and troubleshooting tips, empowering users to address issues promptly․ Familiarizing yourself with the content before use is key to maximizing performance, extending the product’s lifespan, and adhering to warranty conditions․ Ignoring the manual may lead to improper use, damage, or personal injury, making it a critical resource for responsible ownership․

Safety Precautions and Guidelines
Always read and follow the manual’s safety rules to prevent accidents․ Understand warning symbols and ensure all protective devices are in place before operating the snow thrower․
General Safety Rules for Operating the Snow Thrower
Always wear protective gear, including gloves and eyewear, when operating the snow thrower․ Ensure all safety guards and protective devices are securely in place․ Never operate the machine near children or pets․ Keep loose clothing and long hair tied back to avoid entanglement․ Avoid operating in extreme weather conditions or poor visibility․ Never touch rotating parts or attempt to clear blockages without turning off the engine and disconnecting the spark plug․ Keep the discharge chute directed away from people and property․ Avoid modifying the equipment or using unauthorized attachments․ Follow all maintenance recommendations to ensure proper function․ Always refer to the manual for specific safety guidelines tailored to your model․
Understanding Safety Symbols and Warnings
The manual includes various safety symbols and warnings to ensure safe operation of the Craftsman 24 Inch Snow Thrower․ These symbols are designed to alert users to potential hazards and provide clear instructions to avoid accidents․ Common symbols include a warning triangle for general caution, an exclamation mark for important information, and a “do not” symbol for prohibited actions․ Each symbol is accompanied by a brief explanation in the manual to ensure clarity․ Users should familiarize themselves with these symbols before operating the snow thrower․ Ignoring these warnings can lead to serious injury or damage to the machine․ Always refer to the manual for detailed interpretations of safety symbols and follow the guidelines provided to ensure safe and effective use of the equipment․
Assembly and Installation
The manual provides step-by-step assembly instructions, ensuring proper installation of all components, such as the auger belt and drive system, for optimal functionality and safety․
Step-by-Step Assembly Instructions
The manual guides users through assembling the Craftsman 24 Inch Snow Thrower, starting with unpacking and inventorying all components․ Remove six self-tapping screws from the frame cover underneath the snow thrower to access the auger belt․ Roll the auger belt off the engine pulley, as shown in Figure 24․ Carefully align the belt with the pulleys, ensuring proper tension․ Reinstall the frame cover and tighten all screws securely․ Refer to the parts diagram for correct component placement․ Follow the sequence outlined in the manual to ensure all parts are assembled correctly․ Double-check the belt alignment and test the auger rotation before first use․ Proper assembly ensures safe and efficient operation of the snow thrower․
Hardware and Tool Requirements for Assembly
Assembling the Craftsman 24 Inch Snow Thrower requires specific tools and hardware to ensure proper installation․ Essential tools include a screwdriver, wrench, and pliers for handling bolts, nuts, and other fasteners․ The manual specifies the need for self-tapping screws and emphasizes the importance of correctly tightening all components․ Additional hardware, such as belts and pulleys, may be included in the kit or require separate purchase․ It is crucial to follow the parts list and refer to the manual for torque specifications and assembly sequences․ Proper tools and hardware ensure the snow thrower is assembled safely and functions efficiently, preventing potential operational issues․ Always verify the completeness of the hardware kit before starting the assembly process to avoid delays or missing parts․

Operating the Snow Thrower
Start the engine, adjust the chute direction, and control speed settings for optimal snow clearing․ Always follow safety guidelines and operating instructions provided in the manual․
Starting the Engine and Initial Setup
To start the engine, ensure the snow thrower is on a level surface and the area is clear of debris․ For models with an electric start, simply turn the key or press the button․ For manual start models, pull the recoil rope firmly․ Always refer to the manual for specific starting instructions, as procedures may vary by model․ Before initial use, check the oil level, fuel, and ensure all bolts and screws are tightened․ Familiarize yourself with the controls, including the auger engagement lever and chute direction adjuster․ Ensure the chute is directed away from people and windows․ Consult the manual for any specific setup requirements, such as priming the engine or adjusting the choke․ Proper initial setup ensures safe and efficient operation of the snow thrower․
Adjusting the Snow Thrower’s Settings for Optimal Performance
Properly adjusting the snow thrower’s settings ensures efficient snow removal and machine longevity․ Begin by adjusting the auger control to match the snow depth and type, allowing for better snow intake and discharge․ The chute direction and angle can be fine-tuned to direct snow away from windows, plants, or other sensitive areas․ For two-stage models, adjust the skid shoes to maintain proper ground clearance, preventing damage to surfaces․ Regularly check and adjust the belt tension to ensure smooth operation․ Refer to the manual for specific instructions on adjusting these settings, as procedures may vary by model․ Proper adjustments enhance performance, reduce strain on the engine, and ensure safe operation in varying winter conditions․
Maintenance and Servicing
Regular maintenance ensures the snow thrower operates efficiently and lasts longer․ Lubricate moving parts, check belt tension, and inspect auger and chute for damage․ Schedule annual tune-ups and follow the manual’s guidelines for proper servicing․
Regular Maintenance Tasks to Ensure Proper Functionality
Regular maintenance is crucial to keep the Craftsman 24 Inch Snow Thrower running smoothly․ Start by lubricating all moving parts, such as the auger and chute, to prevent rust and wear․ Check the belt tension and adjust it if necessary to ensure proper alignment and operation․ Inspect the auger and impeller for damage or debris buildup, cleaning them as needed․ Additionally, drain and replace the engine oil annually, and check the spark plug for wear․Inspect the skid shoes and replace them if worn down to maintain even ground clearance․ Finally, after each use, clear any remaining snow from the chute to prevent freezing and ensure optimal performance next time․ Follow these steps to extend the life of your snow thrower․
Lubrication and Tune-Up Guidelines
Proper lubrication and tune-ups are essential to maintain the performance of your Craftsman 24 Inch Snow Thrower․ Regularly lubricate the auger, chute, and other moving parts using a high-quality grease to prevent rust and friction․ Inspect the spark plug annually and replace it if worn or fouled to ensure the engine runs smoothly․ Check the engine oil level before each use and change it every 50 hours of operation, using the recommended oil type for cold weather․ Additionally, inspect and tighten all bolts and screws to maintain stability․ For tune-ups, refer to the manual for specific instructions on adjusting the carburetor and ensuring proper belt alignment․ Finally, add fuel stabilizer to the gas tank during off-season storage to prevent degradation and ensure easy startups next winter․
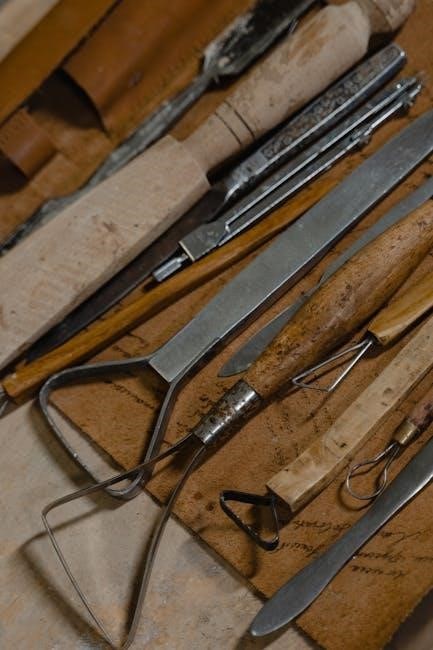
Parts List and Diagrams
The manual includes a detailed parts list and diagrams, identifying key components like auger belts, drive belts, pulleys, and discharge chutes, aiding in repairs and replacements․
Identifying Key Components and Their Functions
The Craftsman 24 Inch Snow Thrower Manual details essential components, such as the auger belt, drive belt, pulleys, and discharge chute, each vital for proper snow clearing․ The auger belt powers the auger, breaking up snow, while the drive belt connects the engine to the wheels or tracks, enabling movement․ Pulleys ensure smooth belt operation, and the discharge chute directs snow expulsion․ Skid shoes adjust clearing height, preventing surface damage, and the scraper bar clears snow down to the ground․ Control cables manage chute direction and deflector height, optimizing snow throw distance and accuracy․ Understanding these components and their roles is crucial for maintenance, troubleshooting, and ensuring the snow thrower operates efficiently during winter conditions․
Accessing and Interpreting the Parts Diagram
The parts diagram in the Craftsman 24 Inch Snow Thrower Manual is a detailed visual guide to identify and locate components․ Available in the manual or downloadable PDF, it illustrates the snow thrower’s structure, labeling key parts such as the auger, impeller, and engine․ Users can cross-reference numbered parts with the accompanying list for accurate identification․ This tool is essential for ordering replacements or understanding assembly․ By aligning the diagram with the written parts list, users can efficiently locate and repair components, ensuring proper functionality․ Referencing the diagram helps in diagnosing issues and performing maintenance tasks effectively, making it a crucial resource for owners․
Warranty Information
The Craftsman 24 Inch Snow Thrower is covered by a two-year warranty, ensuring protection against defects in materials and workmanship, providing users with peace of mind and financial protection․
Terms and Conditions of the Craftsman Warranty
The Craftsman 24 Inch Snow Thrower warranty offers a two-year coverage period, commencing from the purchase date․ It covers defects in materials and workmanship, ensuring repairs or replacements are provided free of charge․ Proper maintenance, as outlined in the manual, is required to maintain warranty validity․ Exclusions include normal wear and tear, misuse, or unauthorized modifications․ The warranty is non-transferable and applies only to the original purchaser․ For detailed terms, refer to the manual or contact Craftsman support․ Adhering to these conditions ensures uninterrupted protection and performance of your snow thrower․
Understanding Warranty Exclusions and Limitations
The Craftsman 24 Inch Snow Thrower warranty excludes coverage for damage caused by misuse, neglect, or unauthorized modifications․ Normal wear and tear, as well as damages from improper storage or maintenance, are not covered․ The warranty does not apply to products used for commercial purposes or rented out․ Additionally, any alterations to the snow thrower’s original design or the use of non-Craftsman parts may void the warranty․ It is essential to review the manual to ensure compliance with all warranty conditions․ For specific details, refer to the warranty section in the manual or contact Craftsman customer support․ Understanding these limitations helps users maintain warranty validity and ensure long-term product performance․

Troubleshooting Common Issues
Identify common problems like engine issues or auger clogs, and follow manual guidelines for solutions․ Check fuel, spark plugs, and clear blockages as needed․ Refer to the manual or contact support for unresolved issues․
Identifying and Resolving Common Operational Problems
Common issues with the Craftsman 24 Inch Snow Thrower include engine failure to start, auger clogs, or poor snow discharge․ Check fuel levels, spark plugs, and ensure proper choke operation․ For auger clogs, stop the engine, disconnect the spark plug, and manually clear blockages․ Adjust the skid shoes if the unit vibrates excessively․ Lubricate moving parts and ensure belts are properly aligned․ Refer to the manual for detailed troubleshooting steps․ If issues persist, contact Craftsman support or a certified technician․ Regular maintenance, such as replacing worn parts and checking tire pressure, can prevent many operational problems․ Always follow safety guidelines when performing repairs or adjustments․
DIY Repair Tips and When to Seek Professional Help
For minor issues, such as clogged augers or loose belts, refer to the manual for step-by-step DIY repairs․ Ensure the snow thrower is turned off and all moving parts have stopped before attempting any fixes․ Lubricate gears and replace worn parts as needed․ If the engine fails to start, check the spark plug, fuel level, and air filter․ For complex problems like engine damage or electrical malfunctions, seek professional assistance․ Certified technicians can handle warranty repairs and ensure compliance with safety standards․ Always prioritize safety and avoid risky repairs without proper tools or expertise․ Regular maintenance can prevent many issues, but for major repairs, contacting Craftsman support or a authorized service center is recommended․

Storage and Seasonal Preparation
Store the snow thrower in a dry, secure location, away from direct sunlight․ Winterize by draining fuel and lubricating moving parts․ Follow manual guidelines for proper preparation․
Proper Storage Techniques for Off-Season
Proper storage is crucial to maintain the functionality of your Craftsman 24 Inch Snow Thrower․ Begin by thoroughly cleaning the machine, removing dirt, snow, and debris from the auger and chute․ Drain old fuel to prevent degradation and add a fuel stabilizer if storing for extended periods․ Lubricate all moving parts to protect against rust and corrosion․ Store the snow thrower in a dry, secure location, away from direct sunlight and moisture․ Ensure the area is well-ventilated and out of reach of children․ Follow the manual’s specific storage instructions to ensure the snow thrower remains in optimal condition for the next winter season․
Winterizing the Snow Thrower for Long-Term Storage
Winterizing your Craftsman 24 Inch Snow Thrower ensures it remains in excellent condition during long-term storage․ Start by draining old fuel from the tank and adding a fuel stabilizer to prevent degradation․ Lubricate all moving parts, such as the auger and chute, to protect against rust and corrosion․ Inspect and replace worn belts if necessary․ Apply a rust-resistant coating to metal components and cover the machine to shield it from dust and moisture․ Store the snow thrower in a cool, dry place, away from direct sunlight․ Follow the manual’s winterization guidelines to ensure the engine and components are properly protected, extending the lifespan of your snow thrower;